What Is Photo Emulsion? Tips for Making Long-Lasting Screen Printing Stencils
When people talk about screen printing, the conversation usually centers on ink, fabric, or the machine — but the unsung hero of the process is the stencil itself. A well-prepared stencil runs smoothly through thousands of prints; a carelessly prepared one causes edge breakdown, closed-up detail, or premature wear from day one, cutting straight into production efficiency. More often than not, that difference comes down to a single material: photo emulsion.
In this article, we explain what photo emulsion is, how the stencil-making process works, and what you need to watch for to get a long-lasting, durable stencil.
What Is Photo Emulsion?
Photo emulsion is a light-sensitive coating applied to the screen mesh. During exposure, the areas hit by light harden, while the unexposed areas wash away — leaving behind a stencil on the mesh that's the negative of your print design.
Two main emulsion families dominate the market:
- Diazo-based emulsions: Once mixed, these have a limited shelf life (typically 4–6 weeks), but they're favored for their resistance to abrasive pastes and water-based inks. For even higher durability, a hardener can be applied to the stencil after it's prepared.
- SBQ pure photopolymer emulsions: A technology that exposes faster, produces sharper edge definition, and — unmixed — can be stored for a much longer period (1–2 years). These are preferred for high-resolution printing that requires fine detail.
- Dual cure emulsions: A middle-ground option that combines the advantages of both, offering wide exposure latitude alongside high durability.
Which emulsion is the right choice depends on the surface you're printing on, the type of ink or paste you're using (water-based, plastisol, abrasive), and the resolution you need.
Stencil Preparation, Step by Step
1. Setting Up the Workspace
Stencil preparation should be done under dim or yellow lighting. Since the emulsion is light-sensitive, this simple precaution prevents unwanted exposure during preparation.
2. Coating the Screen with Emulsion
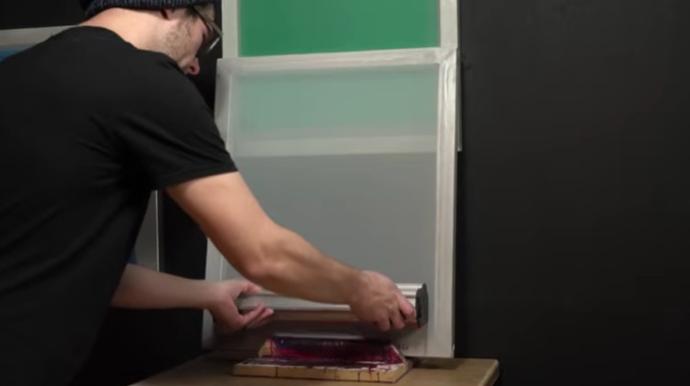
After thoroughly cleaning the mesh of dust and particles, hold the screen at roughly a 60-degree angle and apply the emulsion from the outside, coating upward with a scoop coater twice, without pressing too hard. Then flip to the inside of the screen and apply two more coats, again from bottom to top. For a thicker layer — needed for high-density prints or glitter/puff effects, for example — apply one or two additional coats on both sides and scrape off any excess.
3. Drying
Dry the coated screen horizontally, with the outside facing down, in an oven at 30–40°C for 15–20 minutes. This temperature range isn't arbitrary — as we'll cover below, drying at too high a temperature is one of the most common causes of a short stencil lifespan.
4. Exposure
Exposure time isn't a single fixed number; it depends on the strength of your light source, the clarity of the exposure unit's glass, the quality of the positive film, the thickness of the emulsion coating, the mesh count, and the level of detail/halftone in the design. Because of this, each shop needs to determine its own ideal exposure time by testing under its specific equipment and conditions.
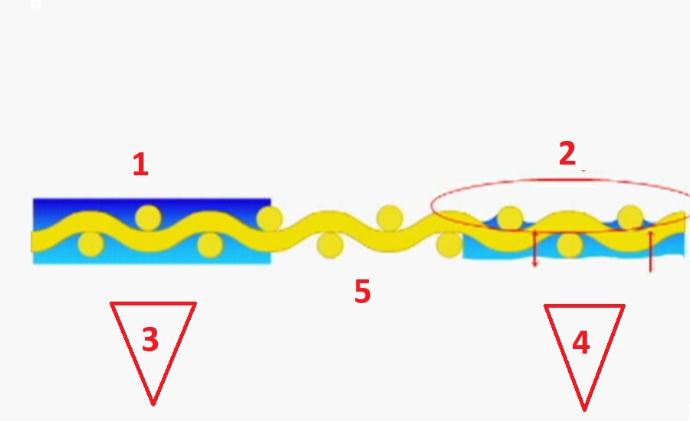
5. Washing Out (Developing the Image)
Spray water on both sides of the screen in a wash-out booth, using cold or lukewarm water (no more than 40°C), until the design is fully and clearly developed.
6. Drying and Touch-Up
Dry the screen again, and touch up any minor pinholes or flaws if needed.
7. Post-Exposure (Full Curing)
Once touch-ups are done, expose both sides of the screen again for 15–20 minutes to fully cure the emulsion. This step completes the emulsion's reaction to light and is the final, critical stage that determines the stencil's ultimate durability.
Tips for a Long-Lasting Stencil
Never overdo the drying temperature. This is one of the most common mistakes that shortens stencil life. Emulsion dried with air that's too hot can flake off, layer by layer, during wash-out. As a general rule: bichromate emulsions should be dried at no more than 35°C, while diazo emulsions can be dried at 40–50°C.
Calibrate your exposure time correctly. Underexposure causes the stencil to wear prematurely and "blow out" under squeegee pressure during printing. Overexposure closes up fine detail. Both hurt production efficiency.
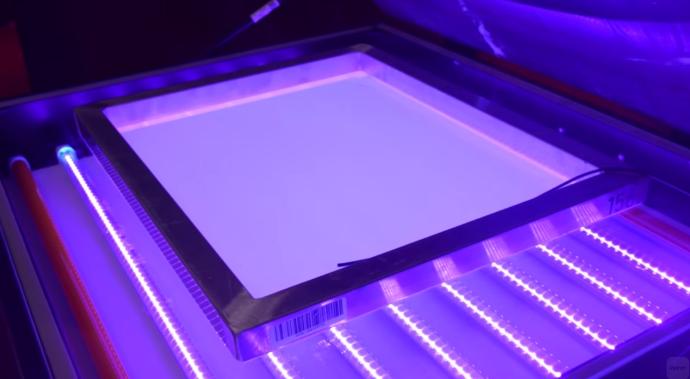
Use a UV light source when possible. Bichromate emulsions can be exposed with regular bulbs or fluorescent lamps, but stencils exposed under UV light come out noticeably more durable.
Use a hardener when working with abrasive pastes. For stencils intended for abrasive printing, applying a hardener in addition to correct exposure time maximizes abrasion resistance. One thing to keep in mind: some hardeners make the stencil semi-permanent or completely non-reclaimable — if you need a reusable screen, factor this in when choosing your product.
Remove excess water right after washing. Laying an absorbent paper towel inside the screen immediately after wash-out prevents water from pooling in fine details and distorting the image.
Be patient and use the right pressure when reclaiming a screen. A well-prepared emulsion won't come off easily without enough water pressure — it stays lodged in the mesh openings. Depending on the mesh count, high-pressure water (in some cases up to 20 atmospheres) may be needed.
Mix diazo emulsions only as needed. Diazo-based emulsions only last a few weeks once mixed — so instead of mixing large batches in advance, prepare only what you need. This avoids waste and ensures you're always working with fresh, high-performing emulsion.
Summary: Critical Parameters in Stencil Preparation
| Stage | Key Point |
|---|---|
| Coating | 60° angle, two coats, extra coats for thick effects |
| Drying | 30–40°C, 15–20 min, horizontal, outside facing down |
| Exposure | Calibrate per your equipment; UV light preferred |
| Wash-out | Max. 40°C water, spray both sides |
| Post-exposure | 15–20 min additional exposure on both sides |
| Abrasive pastes | Use a hardener to boost abrasion resistance |
Photo Emulsion Options at UES
We offer a range of photo emulsions formulated for the textile industry, matched to different printing needs — diazo-based options for shops working with abrasive pastes, and more precise formulations for detailed, high-resolution printing. We're happy to work with you to determine which emulsion best fits your printing method, the ink you use, and the stencil lifespan you're aiming for.
The photo emulsions we work with are sourced from Murakami, a Japanese manufacturer founded in 1965 with more than 60 years of history in the screen printing industry. Murakami has led the way in SBQ pure photopolymer emulsion technology for over 30 years, offering a wide emulsion range formulated for dozens of specific applications — from textile to electronics, glass decoration to industrial printing. That depth of range, paired with consistent quality, is why so many screen printing shops around the world treat Murakami as a trusted reference point.
If you're dealing with recurring wear, flaking, or loss of detail in your stencils, the UES Varak team is happy to help you pin down the right emulsion and application conditions Reach out via our Contact page .